
Everything you need to get the most out of the Bimmatch Revit plug-in
Why you will love it
With the Bimmatch plug-in, you can pull data directly into your Revit model from your organization's standards, specifications, BIM objects, and project requirements — all without leaving Revit.
It's a single, powerful step toward full project compliance: The right information, right where you need it.
For a demo on how Bimmatch works with AI and how to manage an online project, contact us
Open it

In Revit, click the Bimmatch tab in the top-right corner of the ribbon.
-
Clicking on the OPEN BIMMATCH button will open the Bimmatch app in a modal
-
Clicking the MARK APPLIED ELEMENTS button will colorize in the model all the elements that were applied with data from your Bimmatch account
-
Clicking the HELP CENTER button opens this guide
-
Clicking the CHECK ADD-IN UPDATE button will validate on the spot if an upgrade is available
Bimmatch app
Once you click on the OPEN BIMMATCH button, the app modal appears as a floating window in Revit.
You can pin it in the Revit layout.
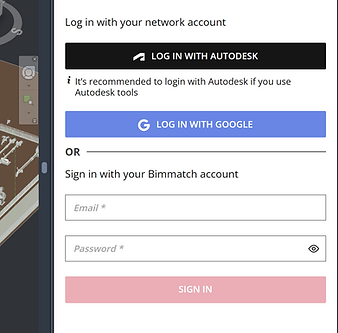
Sign in to your Bimmatch account and you're ready to go.
No worries, the panel position (if floating window or layout panel) is saved for your next Revit session.
Link to online project
Clicking the hyperlink 'Select a project' will open a modal window to select a project from your Bimmatch account.
Linking to a project in your Bimmatch account gives you access to that project's documents, 3D objects, and content - and lets you generate project-level compliance reports.
Even a free registered user can create an online project and content, so open the Bimmatch web app and start creating.

Matching content by element selection
Before stepping forward to the various content in the Bimmatch app, here is an important feature:
When you click any element in your model, the Bimmatch panel automatically filters products, objects, and documents to match that element's context - so you always see what's relevant.
Want to learn about the Bimmatch AI matching?

Market products
Bimmatch provides you with tens of thousands of market products to be applied in your project model.
Product data can be applied in the project model, either with the INSERT DATA functionality or with the INSERT MODEL functionality (if a 3D element is available in the relevant format for Revit).
To view and read about each product, click its title, and a floating panel will appear with additional information.
Click the Search bar to open the filters menu and narrow down results.

Organization objects
Your organization's object library contains the standard components your team uses across every project.
By using these objects, you can track with dedicated reports in the Bimmatch web app how the project complies with the organization's standard.
Product data can be applied in the project model, either with the INSERT DATA functionality or with the INSERT MODEL functionality (if a 3D element is available in the relevant format for Revit).
Even a free registered user can create an object library, so open the Bimmatch web app and start creating

Insert data
One of Bimmatch's most powerful features is the ability to apply specific parameters from any product or object directly to a selected element in your model.
-
Select any item in your model
-
Hover a product card in the catalog and click INSERT DATA
-
Done! Parameters and values are now part of the Shared Parameters
Values are presented in Metric units and will be converted automatically to the actual Revit unit type once inserted

Insert model
Library products or objects with geometry files can be added to your project easily with the following options:
-
Hover a product card in the catalog and click INSERT MODEL
-
The PLACE function will add the selected geometry file to the Revit project, by these methods:
-
The RFA file will be added directly to the project's model
-
RVT and IFC files will be open in a new Revit tab
-
RTE file will trigger automatically the Transfer Project Standards dialog to transfer the System Families to the project file
-
-
The REPLACE function will replace any selected element in the project model with a selected geometry file from the library (product or object)
-
The REPLACE function is available with a geometry file of type RFA only
-
The INSERT DATA function will follow the PLACE/REPLACE OBJECT functions.
Note: The PLACE and REPLACE functions are only available for products or objects that include a geometry file.
.png)

Docs
Bimmatch AI model analyzes the documents in your organization's DOCs library, so any specific information from any document will match automatically to the relevant BIM element in your model.
What does it mean?
Your planning team saves significant time finding the right engineering information, and your management team can generate compliance checks with ease.
Want to learn about the Bimmatch AI Docs?


Industry data
You can attach Uniclass classification codes and embodied carbon values (A1–A3) to any selected element in your model.
All data is saved directly to the element's shared parameters.
.png)
We are here for you
We're committed to giving you the best possible experience with Bimmatch. If you run into any bugs or issues, we want to hear about it — reach out, and we'll sort it out quickly.